Here at AIS, we just completed a test install of Avast’s new “for business” centrally managed Anti-virus software (see this link for full details). The installation went smoothly until we attempted to launch the Silverlight based administration console. We expected to be greeted by a nice, new, shiny console with all the bells and whistles. What we got was…. nothing.
Our Environment
- Windows server 2008 R2
- Avast! Business Protection Plus (version 1.1.6164)
- Standard install of Avast! Business Protection Plus
(All defaults accepted except the SQL Server default. We already had a SQL instance prepared and ready to go) - Test client running Windows 7
Symptoms
Using a default install, the administration console should be available at the following URL
http://ServerUNCGoesHere/Avast/
In theory, this link will redirect you to the Avast! administration console on port 8732 using ssl. We attempt to launch the administration console from our Windows 7 PC using IE9. After 1 – 2 minutes, we received an error simple stating
Internet explorer cannot display the webpage
Helpful….
Root Cause
It didn’t take us long to figure out we had a firewall issue. Port 8732 was nonresponsive to traffic. A quick look at the firewall settings demonstrated the Avast! installer had modified the firewall rules. Two new rules had been added, one rule each for UDP and TCP connections referencing the program
C:Program FilesAVAST SoftwareAdministration ConsoleAvast.Sbc.Server.exe
That should work… but Windows Firewall was not in agreement.
We did not spend the time to figure out why the firewall association to the service level application was not working. Our guess is Avast! is using some behind the scenes redirects which confuse the firewall.
Solution
We need to add port level firewall settings for Avast!
- Open Windows Firewall with Advanced Security on the server Avast! was installed on
- Highlight the Inbound Rules section
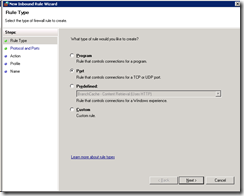
- From the menu select MENU: Action –> New Rule
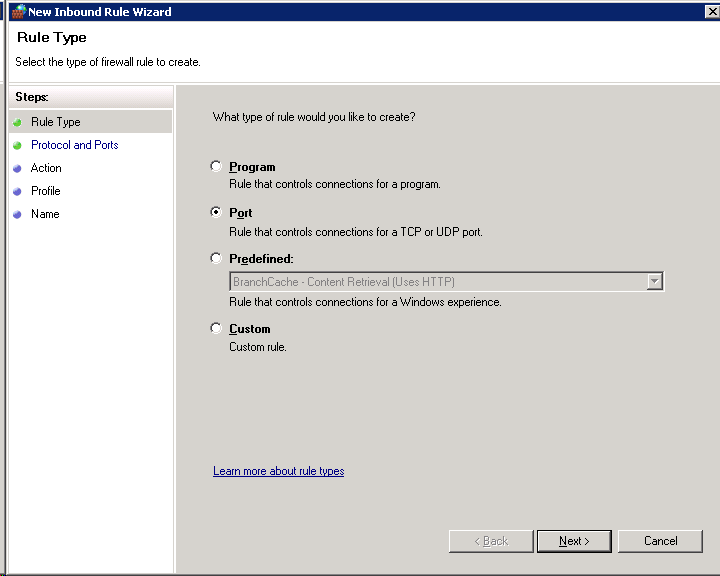
This will launch the new rule wizard - Under Rule Type, select Port
- Under Protocol and Ports, enter the specific ports 8731, 8732, and 25322
NOTE: Your ports maybe different if you did not use the installation defaults
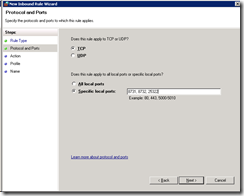
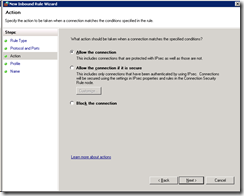
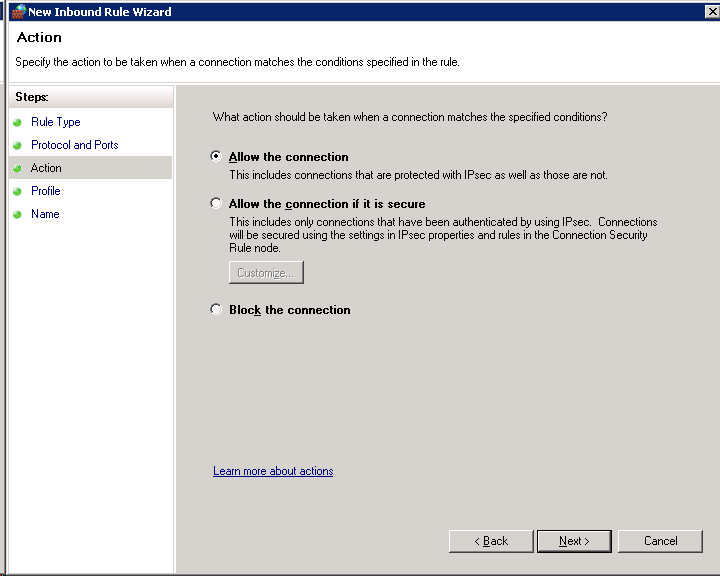
- Under Action, select Allow the connection
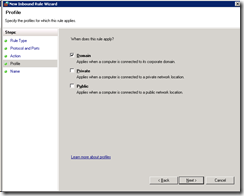
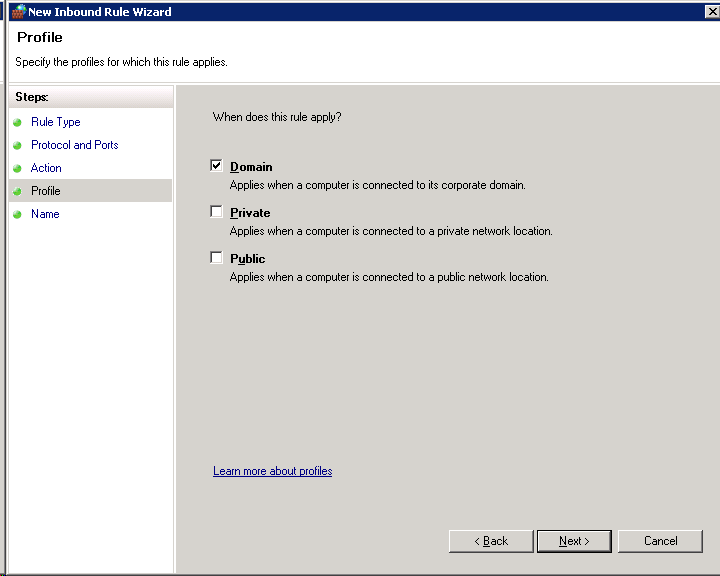
- Under profile, select the appropriate profile for you installation
(In our environment, we selected “Domain” to reflection our network domain)
- Under Name, give your rule a new name
We recommend “avast! Administration Console (ports)” to prevent any confusion

That’s it!
We were now greeted with a nice, new, shiny console with all the bells and whistles.