Microsoft SharePoint is an amazing tool for collaboration and information sharing. At AIS, we make extensive use of SharePoint portals to serve up a variety of informational goodies.
For those of us using SharePoint, we love the support for sub-domains for each SharePoint Web Application. It is very common to see SharePoint URLs such as
http://hr.mycompany.com
http://development.mycompany.com
http://portal.mycompany.com
Using Host Headers in IIS, implementing SharePoint Web Applications on a single IIS server using a single IP is a trivial mater. So trivial that the SharePoint Application Management wizard sets it all up for you!
Trivial; until you start to see sub-domains such as
http://payroll.mycompany.com
http://secure.mycompany.com
For secure data, such as payroll, most companies will start thinking about SSL to encrypt the data between the server and the browser. And so begins the trouble.
IIS, by default, only supports binding of an SSL certificate to ONE SharePoint web application (or any website on the server). Under default conditions, you must choose between securing the payroll or the secure site using SSL. You cannot bind the SSL certificates to both.
Of course, there are several well documented methods for binding SSL certificate(s) to multiple host headers. The problem is they require using the arcane command line function appcmd. Doable, but not trivial.
Fear not, there is an easier way!
IIS 7 supports what appears to be an undocumented feature for SSL and Host Headers. You simply preface the SSL certificate’s friendly name with an asterisk.
Here is how you do it:
Assumptions
- You have a valid SSL certificate already installed on your IIS server
- The SSL certificate matches your sub-domain URL
- You have access to the IIS Manager
- Coffee is brewing, ready to go when you are done
Instructions
- Open Internet Information Services (IIS) Manager
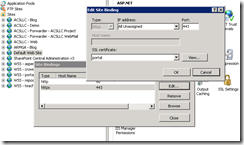
- Edit the Site Bindings for the website you which to assign an SSL certificate to
(right click, select Edit Bindings - Select the HTTPS port and select Edit
- Note that the Host Name (Host Header) field is unavailable for editing
- Launch the Microsoft Management Console (MMC)
- Select Start –> Run
- Type in “MMC” and hit enter
- From the console, select File –> Add / Remove Snap-in
- Select Certificates from the Add / Remove dialog
- Select Computer Account when prompt for which certificates the snap-in will manager.
- Select Local Computer when prompted
- Click OK to add the Snap-in to the MMC
- Locate your SSL certificate
- For self-signed (SELFSSL), look in Personal
- For installed / purchased, look in the appropriate folder the certificate was originally installed in
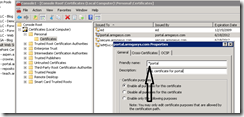
- Right click on the certificate and select properties
- Edit the Friendly Name field so the name starts with an *
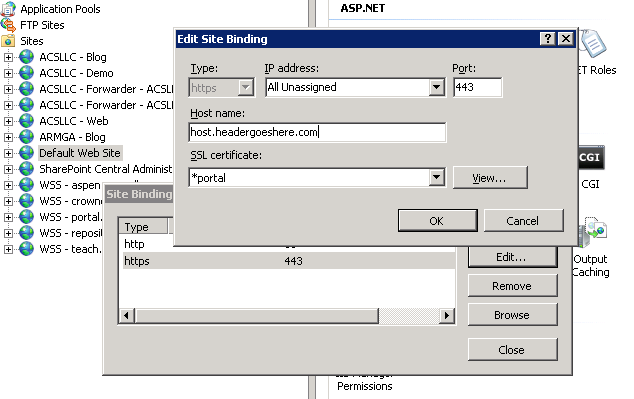
- Repeat steps #1 – 3 above
Note that the Host Name (Host Header) field is now available for editing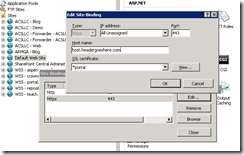


Happy Bindings!
(Coffee Time)